Showing posts with label presentationtools. Show all posts

Monday, August 13, 2012

Have You Thanked a Teacher Today?

I found this video and just felt like I needed to share it!


So my plan is to thank a teacher today and at least one everyday!
_____________________________________________

Did you notice how your attention was drawn to words and phrases in this video based on the way they were presented or moved?
Did you notice whether your attention was drawn more to the words or the background?
Did you notice the how the colors in this video made you feel?
Did you notice how the soft edges of the shapes fit well with the message?

What are some other things you noticed? .
(You can go back and watch it again ... I watched it 4 times the morning I found it)

Any ideas on ways we can make use of the things we noticed?
How can we help administrators, teachers, and students make better use of the things we noticed?

Monday, June 13, 2011

SlideRocket - A Great Presentation Tool

Ever look at your presentations and think there may be something missing? Chances are you've been there. I know I have. I'm not a design expert by any means, but thankfully I don't have to be since a teacher friend of mine introduced me to SlideRocket. SlideRocket is a free presentation platform that makes creating engaging presentations simple. Over the course of the past few weeks I've been using it more and more. Now it's my first choice when it comes to creating presentations. Each time I use it, I end up discovering a new useful feature.

Need a starting point? SlideRocket allows users to copy presentations from their "Get Inspired" gallery as a starting point for their own presentations. This was, and continues to be, a valuable feature for me. Not only did it save me time (since I didn't have to create a presentation from scratch), it also taught me different tips and tricks for making my slides really pop! Other noteworthy features that stood out were...

  • The user friendly editing tools
  • The ability to collaborate with others
  • Finding pictures was simple since it only searches photos that are available under a Creative Commons license (via Flickr). This is a huge time saver in itself!
  • Save time by copying other SlideRocket presentations from the "Get Inspired" gallery
  • Import presentations from PowerPoint/Google Docs with the click of a button
  • Add YouTube videos directly into your presentation by copying and pasting the URL


Aside from SlideRocket being a great presentation tool, it's also important to take into consideration what makes an effective presentation.
Avoiding The Chicken
View more presentations from Marlo Gaddis

For addition tools/resources, check out "Presentations with a Punch!" by Melissa Edwards (@mwedwards)

Friday, February 18, 2011

Skype Lunch & Learn

These are both exiting and crazy times we live and work in today. As a District Instructional Technologist, I travel to many Middle and High Schools to help and train teachers how to use and integrate technology into their curriculum. However, there are times when the attendance in these trainings is low. Teachers have a lot on their plate too and they may have other jobs to go to or children to attend to. Being that the economy is not doing all that well, I wondered what would be an effective way to reach the teachers and help them learn new ways to involve students in their lessons. The answer I came up with is to Skype the teachers during their lunch period, although it does not have to be during their lunch time. It could be arranged during any time that they are free. Skype allows you to share your computer screen. This would allow me to show the teachers how to do things and talk them through it step by step. Another possibility could be that teachers could setup office hours for their students. This is what I want to setup with my schools to reach more teachers and help them understand the many ways they can involve the students in their lessons.

Tuesday, August 24, 2010

Multi-Genre Project

When taking a reading class a few years ago, one of the assignments was to do research and create a multi-genre project. We got to choose the topic and the ways to represent the information we found. I was teaching 4th grade, so I decided to research the Orville and Wilbur Wright, so I would create something I could use when I taught NC Social Studies.

After finding lots of good information from a variety of resources, I decided to create a scrapbook that could have been kept by their mother. I added things and wrote a journal about them from her point-of-view. I included some funny drawings and stories about the brothers that I had never heard before. I have often said that I learned (and remember) so much more from that project than any other project I have done.

I know that the fact that I was able to choose a topic that relevant to me helped in my learning and enjoyment of the experience. Also being able to choose how to "display" my research helped me be able to use my talents and multiple intelligence areas for what worked best for me.I wonder how this project would be different if I did it now using the various web 2.0 tools I have learned about . . . .

I could create a blog or a glog the brothers might have kept or a digital scrapbook. I could use the images I found with animoto or photopeach. I could use xtranormal or blabberize to tell the story of why I chose to create certain things. I could put all the information and projects into something like prezi or livebinder for the presentation. Imagine how fast news of the first flight would have traveled using twitter and facebook? What would those messages have said?

So many ideas and options are available for things to create to show my learning . . .

Shouldn't students have opportunities of various ways to show their learning?

More information and examples of projects created with some of the sites linked above can be found in this livebinder: Presentations with a Punch!

Wednesday, May 5, 2010

Learning at a Glance

Webinars. Online Courses. Face-to-face workshops. eBooks. Digital papers. Websites. Podcasts. The list goes on and on for ways 21st century teachers can learn new skills. But, for today, if you are short on time – check out these quick presentations that give some pretty valuable and useful information at a glance.


Web 2.0 Tools for Teachers

http://www.scribd.com/doc/19576895/Web-20-Tools-for-Teachers


100 Sites for Teachers

http://www.scribd.com/doc/29406652/Top-100-Internet-Sites-for-Teachers


Surviving with Only One Computer in the Classroom

http://kathyschrock.net/flash/onecomputer.swf


Technology for Teachers

http://oregonstate.edu/instruct/ed596/ppoint/sld1.htm


Teacher’s Guide to Web 2.0 at School

http://www.slideshare.net/sachac/a-teachers-guide-to-web-20-at-school


Like the actual presentation tools? Check out this link that gives an inside scoop on several great presentation resources – for teachers and students alike.

Wednesday, May 27, 2009

What's in a Presentation?

So in an effort to bring free web 2.0 tools to you that you may not have already known about, here is another one that I had overlooked previously.

How many of you have ever used the web-based utility SlideShare? Did you know that you can upload an mp3, combine it with the slideshare and create a SlideCast?

According to the website there are only a few steps to follow to get your slidecast up and ready to present.

• Upload your presentation file to SlideShare.
• Go to Edit slideshow>Create Slidecast tab. Enter your mp3 url there
• Synchronize slides & audio using the synchronization tool and click publish

Check it out for yourself and see if you like this tool and if it will work for you in your presentations to make them more interactive.

images and steps shared from: SlideShare

Thursday, April 30, 2009

Revisiting Some Presentation Tools from the Blog

As a kid I used to hate it when my favorite TV show would have an episode full of flashbacks to previous episodes. But this is completely different. :)
I'd just like to give a second look at a few presentation tools reviewed in earlier posts on this blog that I've used and enjoyed. Sometimes I will use Powerpoint for a presentation - it's comfortable but predictable. I've enjoyed using the following web-based tools as an alternative to good old Powerpoint and think you might as well.
  • Vuvox - Vuvox was reviewed by Brian this past January , still has the linear feel of Powerpoint but with more flow and pazazz. You can create "hotspots" within the sliding presentation images to include hyperlinks and different forms of media. You'll need to set up a free account to start using, but I think you'll find it is a nice alternative to Powerpoint while still being similar in nature.
  • Prezi - Evan blogged about Prezi back in March calling his post "Presentation 2.0." And part of Prezi's appeal is its presentations offer a nonlinear feel to them. You still create a path or map to text, pictures, media, etc... but the movement in Prezi allows the presentation to spiral, zoom and spin around the content. When used properly this produces a very engaging presentation. Like Vuvox you just need to setup a free account with Prezi to get started.
  • Pageflakes-Pageflakes was the subject of one of my blog posts earlier this month. Although Pageflakes isn't exactly intended to be a presentation tool (like Vuvox or Prezi), it offers a great way to present information. In Pageflakes you can set up an entire page with content related to a subject. I tried this out in a Google Earth workshop recently, where I created a page filled with content related to Google Earth (links, RSS feeds, video and text) instead of a Powerpoint. I don't think I'd try this with every presentation, but I think it worked well for this workshop.
So there they are; a few flashbacks errr..."gems" from past blog entries to help change the ways we look at presentations.

Tuesday, March 31, 2009

280 Slides - Easy Way to Make Presentations

Any time I've needed to put information into a presentation, it usually started with Powerpoint - until lately. MovieMaker, PhotoStory, Voicethread, and Google Docs are some of the choices I've used to present information to others, help with training methods, and share findings. In this ever-changing world we are always looking for new and better ways to share.

While at the NCTIES 2009 conference, I went to the Web2.0 Digital Tools for Digital Kids session with Dr. Howie DiBlasi. One of the free tools he shared from his top 53 web 2.0 sites was 280slides. Basically, it is free powerpoint that is web 2.0 based. The learning curve is minimal and it is very easy to use. The first time you use the program it will ask you for an email address. Then just click on the Launch button, choose what kind of presentation you would like to do - create new, open a saved file, or import an existing file - and begin working. All the familiar tools are right there for you.

As you work on your presentation, 280slides autosaves every few minutes so you don't have to worry about losing your work and it will always be the latest version. Since everything is saved to their server, you can get to your presentation anywhere, anytime as long as you have an Internet connection.

Already have some presentations you would like to use at a distant location and not carry them on a thumbdrive? 280slides will import existing Powerpoint presentations so you can make changes and/or additions, or use them as they are. The reverse works as well - create your 280slides presentation and then download it as a PowerPoint file (even 2007), an open document, or a PDF. When you feel the need to share it with others, just click on the Share button and email it to someone (2007 format only), publish it to the web through SlideShare, or embed a link to it on your website.
The toolbar has everything at your fingertips so you can start fresh, import, or publish. It was easy to upload photos and movies from my own sources or from a website, even YouTube, and Flickr. Changing themes and layouts was a breeze. One click on the yellow note icon and you have a place for presenter notes. All in all, this is a fun and easy to use web-based program.

Need to create or work on a presentation? Let's think about meeting at a Starbuck's or Panera Bread, get comfy in a chair, logon and put the web to work. See you there!

Friday, March 20, 2009

Presentation 2.0

When I recently attended the NCTIES conference at the beginning of March, I was in a session where the presenter used a new web tool that I had not seen before. This web tool gave new meaning to my interpretation of a presentation.

Prezi is the name of the website and it takes presentations to the next level. "With the help of Prezi you can create maps of texts, images, videos, PDFs, drawings and present in a nonlinear way." One great thing about this web tool is that you have the ability to make your product Private or Public.

I could not believe how quick and easy it was to get started and have a presentation up and running in as the site says about 5 minutes. I had all of my resources in place and ready to go. Within the presentation I was able to select a background from a few canned ones they have. 
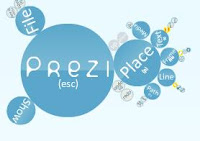
Then you are on the canvas and ready to create your new presentation. Using this palette tool you can begin adding your material. Now the sky is the limit with what and how much information you want to use. The site automatically saves your progress every few moments but if you click the Blue File Circle you can Save or Save and Close. You also have the Blue Show circle which allows you to see immediately how the presentation will look. On the Blue Place circle you have all of your tools for the presentation. At the top is Media which you can use to upload Images and video.. there is a downside right now you can only upload Flash (flv) video but as this moves out of the beta phase there may be different options available. The Text options al
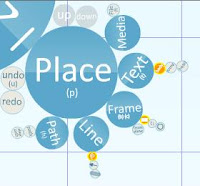
lows you three choices for fonts in html code, body, strong and head. With Frame you can section off your presentation into different areas. With Line you can create a high-lighted area, an arrow line or a free hand draw line. Path allows you to create the flow of your presentation. See the video to learn more.


Now the site offers a lot of other tools for you while you are creating your own presentation. The site offers the Learn Tab which has a number of videos and interactive tutorials for you. There is the the Showcase tab that has 27 pages of shared presentations that others have done on varying subject areas. The last tab is the Forum where you can get and give feedback on the site, issues that you are having or just ask about new features that might be available soon. Speaking of features what else can Prezi do for you? Here is another video to show you how you can emphasize areas of your presentation.

Images & video provided by Prezi.com

Thursday, January 22, 2009

Using Vuvox To Create Exciting Multimedia Presentations


Here is a new way to add flare to your presentations. It’s called “Vuvox”, your visual voice. This free online resource allows you to create a multimedia filmstrip that you can slide left and right on your monitor. You can add pictures, text, video, music or voice files and hyperlinks to your sliding filmstrip. Go to http://www.vuvox.com/. Click “get a free account”. Fill out the info. Click the “create” tab at the top of the page and choose either express, collage or studio. Express is a fast condensed version of the studio creation. Choose a presentation style and links to your media libraries through RSS feeds. Collage is a multimedia platform that allows you to combine your photographs, videos, sound files and text into interactive stories. The collage can be published or embedded into any website or blog. You can cut out parts of an image to use it as a frame or mask. There are multiple layers so you can place an image behind your newly created frame to spice up your photograph. You can create “hot spots” or links to other media, text or websites. You may choose to add your text, soundtrack or audio file directly to the page. When you choose to create a collage you have the option to watch three short instructional videos to help you get started. When you click “create with studio”, you will go through a series of steps to collect your media, create an interactive presentation and embed your presentation in a blog or a website. Give it a try and add flare to your lessons or presentations.

Friday, January 16, 2009

One more Powerpoint Presentation!

Ever hear the statement, "If I see one more Powerpoint presentation!" Many times when students, teachers, or any presenter needs to share information they reach for the usual application, only to find it is an outdated version or won't work on a particular computer. As our ideas become more vivid in current technologies, another choice for making a presentation look awesome as well as be accessible by others would be SlideRocket.

Since SlideRocket is web-based you don't have to worry about using up your hard drive space or filling up a home directory on the server. Creations can be stored and shared from centralized libraries where everything can be searched, tagged, and sorted. Imported personal images, flash animations, and video can be stored in the Assets section. Video from Flickr, TeacherTube and other sites can easily be imported. Its plug-in architecture allows for an endless number of slide transitions and effects, 2-D and 3-D, that will work on a PC, Mac, or Linux.

Sharing your work with everyone is as easy as publishing the URL or embedding it into your webpage. You can control who sees your creation by only inviting certain people. Once shared, either to a few or many, you have control and can see when it was viewed and by whom, and how long they spent on each slide. Any Google spreadsheet can be imported and then it becomes a fully styleable table or chart. There are shapes and drawing tools to make annotations or diagrams. Hyperlinking to any element is a breeze.

SlideRocket is another solution to help make presentations look great and add a little more "attitude." As Nick Yingling says, "Sometimes its not always what you're saying so much as how you're saying it."

Friday, December 19, 2008

Convert PowerPoint Presentations to Movie Maker Movies


I've found that many teachers use PowerPoint. If PowerPoint is used creatively, it can be an effective classroom tool. This can be done in a few steps. First of all, you (or your students) should create your own dimmed backgrounds. Second, add your own digital voice files. This will make your PowerPoint presentations unique, personal and effective. But that is not what this blog is about. I want to show you how to take the PowerPoint’s you have and turn them into Movie Maker movies that can be played in Windows Media Player. First of all, let it be known that Movie Maker is a very easy program to use. Check it out; I think you will agree with me. So here we go. Step 1, choose "save as" in your PowerPoint file to save all your slides as jpegs. This will save them in a folder with the same name as your original PowerPoint file. Next, open Movie Maker and import the jpeg images. Then just drag the jpegs (slides) in the correct order to add them to the storyboard. If you want to add transitions, click view transitions under edit movie and drag the transition of your choice to the transition block between the slides. Now switch to the timeline view. Click on a jpeg (slide) then put your mouse on the right edge. The arrow will turn into a red horizontal left/right arrow. Drag to the right to increase the amount of time the image is shown in the movie. You can see the length of time the slide will be displayed. The next step is to import your audio. This can be music or your (or your students) voice that you recorded and edited in Audacity. Right click on it and choose add to timeline. Now choose "save project" from the file menu. This saves the file so that you can open or edit it later on. Next choose "save movie file" from the file menu. Leave the default "save your movie for playback on your computer". Again, leave the default "best quality". Now you can play the movie in Windows Media Player.

Wednesday, August 20, 2008

ZoomIt

I've used a presentation tool for some time called ZoomIt, which I have downloaded on my flashdrive. This free download from Microsoft’s Windows Sysinternals includes a screen zoom, an annotation tool and a countdown clock. Many of these features are similar to parts of other software for interactive whiteboards, but ZoomIt's portability, simplicity and ease of use separates it from the others. The program will run on any PC and hide in the tray after you launch it. If you think this tool could help focus or emphasize parts of your lesson or presentation I’d suggest you download it and give it a try. Check out the short video beneath to witness the power of the zoom.