Showing posts with label technology. Show all posts

Monday, September 23, 2013

An Inside Look at School News

Your Principal comes to you and asks you to start up a news broadcast at your school.  What do you do?  Where do you start?

Well, it seems like I have been living this dream for a couple of months straight now and want to share some tips and tricks with you on what I have done as I talk with schools.

Now this is just what I have done and by no means is the end all be all of setup processes but maybe you can pick up something along the way.  I will be breaking this up into a couple of blog articles because I can get pretty wordy, and I want you to come back.

So according to this scenario where do you begin? Well, at the beginning of course.

Where do you start? Let’s talk about what you need to have to get things going.  What kind of equipment do you need to have to do a newscast?

Actually this is the easiest part of the whole process.

Really, you might be thinking, yes it is.

So what should you have? Do you need to buy anything?

Whoa, hold on now let’s just take a look at what you have right in front of you first before we start trying to go through that long buying process that every school system has.

(At the end of the blog I will put in some other additional things that you could use to create a newsroom.)

Equipment:

A camera that’s it, that’s all, nothing else.

I am not talking about a Digital or Polaroid camera; I am referring to a video camera.  What type of video camera do you need?  That’s easy depending on what type of computer you have it, might be right in front of you.

Yes I am talking about a Web Camera; you know the one that is built into your laptop or one you may have purchased to go with your desktop computer.  I am of the firm belief of using whatever you have access to before buying anything.

So you have your webcam what else?  You do need to make sure that your webcam does have a built in microphone that is important.  If it does not then you will need to have access to a microphone that can plug into a computer.  I will explain a little more about sound in just a moment.  OK you have the video camera w/a microphone what’s next?

Now you need a space.

Location:

You want to make sure that you have an area set aside to be your newscast location.  It can be anyplace you have available in the school. A small area set aside in a classroom, Media Center or one of those wonderful Cafegymnatoriums.  (It took me a couple of years to be able to pronounce the word.)

The ideal location would be one that is separate from high traffic areas like a dedicated room.

I know that this is not common for most schools, so use what is available to you.

Now that you have figured out what space you are going to use what’s next?  My suggestion would be some chairs and maybe a table, a table is not always necessary though.  As long as you have a comfortable seat for your students to sit that is all that is really needed.

In this area I would also try to eliminate, as much as you can, any additional noises by using what is available as a sound break.  You could use partition walls, book shelves, mobile coat closets, desks, carpet squares, rugs or anything else that could create a noise barrier.

Broadcasting:

Now that we have our equipment and a location to broadcast from how do you get the news out to your entire school?  There are many ways to do this; I will outline a few of them that have been successful in our schools:

  • A quick and easy way is to just record the newscast with the students and then post the video up for the school to see at a later time.  To do this you will need to have a computer with some sort of recording software on it.  If you are using a PC you could use the built in Windows Live Movie Maker, or if you have a Mac you may have iMovie which you can use.  Both software applications have the ability to record from a video camera and then each have some tools for editing and saving the video to your computer to post for all of the students and teachers to see.
  • A second way is to use an online resource to show the newscast live.  A website that allows you to do this is Ustream.TV, the site allows you to live stream video and audio over the internet as long as you have a network connection from the computer your webcam is attached to.  You will have to set up an account on the website for streaming but it is free at least the last time I used the site it was.  You will set up the station to watch, make sure that the camera is connected and visible by the website.  Then you will get a link that you will send out to the school for classrooms to click on and watch.

Ok I mentioned before about sharing some other ideas for Equipment, Location and Broadcasting.  These are the beyond the basics of what is listed above:

Equipment:

  • Video cameras:  Camcorders, singular or multiple to use with a video changer for multiple camera angles.
  • Sound: Sound boards to allow for multiple microphones whether wired or wireless.

Location:

  • Room:  A studio room that is already sound proof and wired for the equipment.
  • Broadcasting:  Closed Circuit Systems can be used if available or a web-based broadcasting system.

This is just a small start to get a newscast going in your school.  Over the next couple of weeks I will talk more about the behind the scenes things that need to be done with student expectations and some interesting tools and techniques you can use to make your newscasts more interactive and fun so stay tuned for more.

Wednesday, November 9, 2011

Ah Ha Moments - Using Student Response Systems with Websites

In one of my workshops we were viewing, testing, and working with lots of online resources trying to find more ways to integrate a technology piece into vocabulary curriculum. The freerice.com website brought about a lively discussion; each spoken idea sparked another way to use the site in all subject areas.

Free Rice is a site that can be viewed in English, Spanish, Italian, French, and Chinese. Everything on the site changes into the chosen language. What a way to practice another language! It appeals to those who want to help others, make a difference in someone else's life, and just have fun learning new words and their meanings or the multiplication tables or Chemical symbols. For each correct answer, the United Nations World Food Programme donates 10 grains of rice to help end hunger. The teachers quickly figured out ways they could find time for the students to participate and even set up a "challenge" to see which class could help contribute the most for this non-profit organization.

As we discussed the possibilities for the freerice.com site to be incorporated with Social Studies, one of the teachers shared an idea of how she was going to use her student response system with the site. She is going to create a questionnaire with A, B, C, D responses to choose from for the students to respond to as she marks their answers on the website. They all will be able to participate, learn new vocabulary and help end hunger. Some of the teachers were going to create vocabulary questions, using the terms from their studies, and have the students do quick assessments with the response systems. They felt the students become more engaged when using the technology.

It was so much fun to see the "Ah Ha" moments of how to use the websites with the technology available to the teachers and students. Maybe you could share one of your "Ah Ha" moments - the more, the merrier!

Tuesday, June 14, 2011

Words in the Clouds

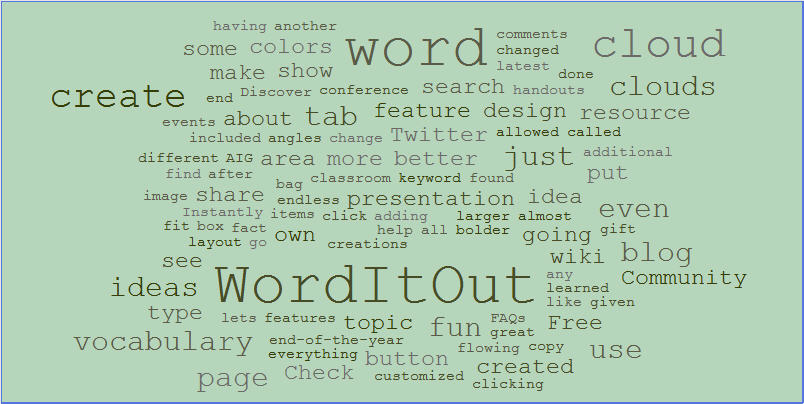
 I have been having fun using Wordle to create word clouds for about everything and adding the created  image to blog posts, wiki pages, handouts, and more. While working on a presentation I was going to do at the AIG conference, I found a very similar resource called "WordItOut."  It also allowed me to create a cloud of words from my own text but with some additional features.

My presentation included different ways to teach vocabulary and use words from any subject area. What fun we had taking a paragraph written on a given topic and pasting it into WordItOut. We tried Math terms, Science vocabulary, Social Studies events . . The ideas were flowing. Instantly the words were put into a design that showed the most often used words in larger and bolder print. We could change the colors, the layout and even the target area where the word cloud would show on the page.

WordItOut is another free, online resource and you don't even have to register to use it. The Create tab is where you can start your own word cloud. Just type in the words you want to use or copy the words from a story, blog post, or list and paste it into the box. The word cloud can be changed to fit the mood or style needed - the possibilities are almost endless with all the colors, shapes, angles and more. The Discover tab lets you view page after page of creations created by others. Wondering about a special topic - just type in a keyword search to get an idea and see what has been done. It doesn't show you how many word clouds go with the search, but I don't mind clicking on the Next button to see more.

To find out the latest news or maybe need to report a problem, just click on the Community tab. You can read and share comments or check out the FAQs. If you have an idea for a feature that might make WordItOut even better, send in your suggestion under the Ideas button. I really like the fact that they are open to suggestions that might make their program work better for the end user.

A fun, end-of-the-year project would be to have the students help design a word cloud of things they have learned and then put it on a t-shirt or bag. WordItOut has a great feature to create and purchase customized gift items. What a way to share what is going on in your classroom! Check it out in the Community section.

Here are some other resources and links for ideas and uses of WordItOut and word clouds:
    I suggest giving WordItOut a try with your next lesson and see how your words look in the clouds.

Tuesday, June 7, 2011

Knowing What's Right- Part 2 of 4

Last week I wrote a post that posed the question:
Are we using the RIGHT tools at the RIGHT time with the RIGHT people?


Let's focus this post on the
RIGHT TOOLS. We all know there are plenty of tools we can use in teaching and learning. There are web-based tools, software, hardware, print resources, writing utensils, manipulatives and so much more. The question is how do we know what is the RIGHT tool?

Our district, like many I am sure, have studied Robert Marzano and his Classroom Instruction That Works book. We even have the 9 High Yield Instructional Strategies incorporated into our Classroom Walkthrough data. The biggest ah-ha! moment for me as I learned about the strategies came when I heard him speak about the erroneous understandings most people have about his research.


Marzano tells educators to stop viewing the strategies as a checklist that has to be done every lesson/day/week. Even the best strategy when used can produce negative results. Teachers need to know which tool to pull out of their toolbox for the right situation (which I will address in the next posts). To apply this reasoning to the use of technology or instructional materials as a whole is very appropriate. There are times when the best tool to use for teaching and learning may be to use a pencil and paper (I realize as a technologist I am committing blasphemy here). The key to planning is to start with the curriculum FIRST and then find the right tool. The lesson should never be about the tool. We do not start planning a math lesson saying, "What am I going to do with this pencil?" We need to match the tool to the content not the reverse.

The job of a teacher is to make sure he/she has the knowledge of what tools are available and how to best apply that tool. This can be done through workshops, reading professional journals and magazines, talking with other teachers, sharing on Facebook and Twitter, and so many other ways. For me, Twitter became the learning network I tapped into early. There I get short (140 characters or less) bits of information on resources that others are using and how the may have implemented it. The most satisfying part is being able to pass that same information on to others easily. One of my closest friends is a media coordinator/guidance counselor in Virginia. She follows my Facebook and Twitter feeds and then shares it with her staff at school.

Having a personal learning network (PLN) can be the key to understanding what are the RIGHT tools. I use my PLN to find tools that others are successful with integrating into the curriculum. Below are some of my favorite posts (found through Twitter over time and saved in Diigo):

The Technology Toolbox: Choosing the Right Tool for the Task By Kim Cofino

http://kimcofino.com/blog/2008/01/19/the-technology-toolbox-choosing-the-right-tool-for-the-task/ 


State of New Jersey Department of Education Technology Toolbox
https://www13.state.nj.us/NJCCCS/TechnologyToolbox.aspx
 

70 Tools in 70 Minutes Presentation by Silvia Rosenthal Tolisano
http://langwitches.org/blog/2010/03/29/70-tools-in-70-minutes/ 


50 Web 2.0 Tools Your Students Want You To Use
https://sites.google.com/a/students.halldale.org/tech-tool-reviews/family-profiles/design-tools/cr


Once a teacher understands the tools available and fills his/her toolbox, the next stage is to understand the RIGHT TIME to use those tools.

Thursday, June 2, 2011

Knowing What's Right- Part 1 of 4


Several months ago, I presented a session called "What Makes a ___ Teacher?" at the NCTIES conference in Raleigh, NC. During the presentation, we discussed the new Teacher Evaluation instrument created by McRel for the NC Department of Public Instruction. This instrument is aligned with 21st century skills (as outlined by the Partnership for 21st Century Skills) and includes the integration of technology. As teachers and administrators were trained on the new instrument, there was an outcry from many stating that they could not be held accountable for these skills if there was not a high level of technology readily available for use at their schools. There was also a wide scope of what schools considered to be Proficient to Distinguished. The goal of my session was to narrow that understanding and start a conversation that could be spread statewide.

The key to understanding what can and should be done with technology integration in schools is standards. ISTE updated the National Educational Technology Standards for students, teachers and administrators over the past several years. These standards were created and reviewed by educators from all over the country and include scenarios of how they look in schools (even includes my friend Cathy Evanoff and the work she does in Nags Head, NC). When our district was trained in the instrument and we looked at technology's role, I asked our administrators to consider whose standards they were using to measure their teachers- our school, district, or do we look at the bigger picture?

If we understand that issue, we then need to understand what is happening in a classroom. The success of technology integration relies on three things...

Are we using:
The Right Tools at the Right Time for the Right People?

I will be sharing my thoughts on this over the next few posts. I would love you to be part of a conversation that delves deep into how we help support teachers with this growing problem!

Sunday, January 30, 2011

"But I don't do technology"


I recently read a blog post from Elizabeth Peterson called Face Your Fears of Art Integration. In that post, she listed 4 common fears about art integration that she hears from teachers and her suggestions for overcoming or dealing with those fears. I wrote a blog post previously saying that I felt like many of these same "fears" also applied to technology integration. (Part of me thinks of these "fears" as excuses or reasons for not even trying.)
  • Fear #1 – I’m not an artist.
  • Fear #2 – The TEST is what I need to focus on.
  • Fear #3 – My administration/colleagues will think what I’m doing is foolish.
  • Fear #4 – I will make mistakes.
Right now I am going to focus on Fear #1 – I’m not an artist. I can't count how many times teachers have looked at me and basically said "Technology is not my thing." I can relate to that statement because technology was not really "my thing" in the past either. In fact my husband who is an engineer thinks it is pretty funny that I am so involved with educational technology. Hint: It is the EDUCATIONAL part that makes sense to me. Technology may not be my thing but teaching and doing anything possible to encourage student learning is ...

Although I can relate to the above comment, I don't really understand it. Start small with technology. Come up with an idea or think of a lesson that you want to try in a new way and then just try. You don't suddenly have to flip a switch and go to using "technology" all the time.
When I started using technology in my class, I began by making powerpoints to go along with my writing lessons (very teacher-focused, but it was a way to start for me). A few years later my students began responding to blog posts centered around Problem-based Learning. We (the students and me) got to where we felt pretty good about the blog posts and comments we were writing, so we decided to work together and try out some other technology tools. I remember showing my students how to leave typed comments on a VoiceThread project. I was planning to wait a little while before introducing the audio comment feature.

My students did not know or follow my plan. They saw something that was possible and went for it. I did not want to try that at first since I wasn't exactly sure how to do it. My students and I learned together. They were proud of our creations and showed them off. A few students even showed their parents how to leave comments on those projects.

At one time I was the teacher who wanted to be in control of everything that happened in my classroom. I wanted to know things were going to work before I tried them. I came to realize that I learned more from the things that did not go exactly perfect in my classroom that the things that did (I think students did too). I guess those could be called "teachable moments" or "learning experiences" for the students and the teacher!

There were times in my classroom when I chose to use technology and times when I chose not to use technology depending on what I thought would best support student learning. For me that is what teaching is all about ... doing whatever is needed to help students learn ... even if that means using some technology.

Wednesday, December 1, 2010

Technology Fun in December

Image from Crayola.com
 Many times some of the most fun that students can have is with colored pencils, crayons, markers, paper and glue. I enjoy reading the monthly Crayola newsletter to see the list of projects and craft ideas. This month as I read thru the list I started thinking of how many of these projects students and teachers could create with available technology.


The first one that caught my eye was taking old CDs and turning them into ornaments. Instead of students painting over the CDs, create a double circle template in Word or a double circle template in Publisher. Let students use the drawing tools, adding shapes and colors to each circle on the page, print and glue to both sides of the CD. Students and teachers can create all kinds of cards and projects with Publisher, uploading pictures and adding their own creative touch.

There is lots of coloring pages, crafts and educational ideas at Crayola. Teachers should check out the resources provided by Crayola: lesson plans, art tips and techniques, Crayola Dream Makers, success guides, parents & teachers as partners, certificate maker and color science. Dream Makers is a guide that provides fun and creativity to standards-based learning lessons for Language Arts, Social Studies, Mathematics, and Science. Currently Dream Makers is not available for North Carolina Standards but the free sample guides will show a subject area lesson complete with objectives, background information, resources, assessment and suggestions to extend the lesson to give teachers ideas in ways to enhance lessons.

Crayola continues to build lesson plans for all ages. If you haven’t looked at the lesson plans in a while here’s a list of available lesson plans by grade levels.
  • Grades K-3          695 lessons
  • Grades 4-6           929 lessons
  • Grades 7-12         452 lessons
  • Special Needs students - 355 lessons
To check out all resources for educators please go to:
http://www.crayola.com/educators/index.cfm?n_id=5

Monday, November 22, 2010

Testing Techniques

When I was asked to help administer a math test, I really didn't think much about it. Testing is testing, right?

All the students looked much the same as when I was in high school - young, studious faces; some a little nervous with others holding onto the "I can do this attitude." The most noticable difference was the technology piece available for them. Times have definitely changed. I had paper and pencil to figure out my solutions to the extensive questions. Some problems would take an entire sheet of paper. I watched the students read the problem and then reach over for their T1-84 calculators without a second thought to start plugging in the information. Within seconds, there was the answer. Of course, they still had to know the method to get the correct answer. It was exciting to see the changes from pencils flying across the page writing numbers and characters to fingers pressing buttons on the calculators confidently and quickly.

As the technologies advance and try to stay up with our thoughts and needs, I just wonder how we'll do testing in the future - touch screen with calculating capabilities built in, headset with microphone and individual testing areas, or devices that can read your thoughts and record the answers. The possibilities are endless. What direction do you think we're going?

Friday, July 17, 2009

10 Ways to Become More Tech Savvy This Summer


Have fun checking out each of these tools and think about how you could integrate these tools into your lessons.

  1. Create a Video Vault
    a. Use Miro 2.0 (free open source HD video player and video podcast player) to select videos to use with classroom lessons. Save videos to a flash drive and you’re ready to content specific videos to your students.
    b. http://www.getmiro.com/index2.php

  2. Using Photos
    a. Use Big Huge Labs to do fun things to photos, such as make posters or magazine covers.
    b. http://bighugelabs.com/

  3. Creating Comics
    a. Turn pictures into a comic book by using Comic Life software or create storybooks or picture albums.
    b. http://plasq.com/downloads

  4. Create a Wiki
    a. Wikis are a great place to organize, collaborate and share information with your students and staff. Try using PBWorks.
    b. http://pbworks.com/

  5. Form a Questionnaire
    a. To help students understand content more deeply teachers need to question students. Try using SurveyMonkey to create professional online surveys for your students or staff.
    b. http://www.surveymonkey.com/

  6. Share Snapshots
    a. Teachers can start a project within the school, district, or across the US by sharing images and information through Picasa, a free photo editing software from Google. Teachers can create photo web albums to share and students can enjoy adding pictures to the web albums.
    b. http://picasa.google.com/

  7. Survey a Situation
    a. By using Google Maps check our various locations your students will study this fall thru novels, social studies or historical events.
    b. http://maps.google.com/

  8. Cache In
    a. Geocaching can be a great way for your students to find places they are studying. Geocaching uses a global-position-receiver that makes latitude and longitude come to life for your students.
    b. http://www.geocaching.com/

  9. Know the News
    a. How great would it be for your students to read front page news items from around the world? To help students better understand the global economy think about using Newseum, an interactive online museum.
    b. http://www.newseum.org/

  10. Listen Up
    a. Have you ever wanted to set up a series of stories or poems for your students? By using Lit2Go teachers can select from free audio collections of public domain books to download for your students. Collections can be browsed by author, title, or database and can be downloaded as a PDF so students can read along while listening to the stories.
    b. http://etc.usf.edu/lit2go/

Take some time to browse through these great resources and think of all the ways these resources will motivate your students to be active, engaged learners.


Article from Edutopia The George Lucas Foundation – July 10, 2009:
http://www.edutopia.org/tech-savvy-summer
Image from Microsoft clip art

Friday, July 10, 2009

Notes from the Ashe County Tech Conference

I had the opportunity to present at a tech conference in Ashe County this week. It was a small but well run conference that brought in a lot of educators from the county and few from beyond. It is always great to interact with teachers on summer break. The teachers seemed excited and interested in learning about new technology, and I met some really dedicated educators doing great things in their schools. I think sometimes having the summer time to reflect and use new technology is a key factor in whether teacher will use it in their classroom.

The session I taught was on using Pageflakes and Netvibes, and my group did a good job of grasping how this could both allow them to organize web content for themselves, and also use these startpages to use in instruction. The participants in the session also seemed to understand the need for having tools like RSS feedreaders to organize the massive amounts of information online. A key skill for 21st century students will be learning to use tools to help access and evaluate the information on the web, and we need teachers to model these skills. I shared my email address and encouraged them to share their experiences with me. I'd enjoy hearing what they've done with these tools.

During the conference I am reminded of how all those in education are dealing with the same issues. Our districts may vary in size, our kids may look and talk a little differently, and classrooms may be outfitted with various equipment, but we are all searching for ways to engage students in learning with technology. I was very pleased to be a part of this conference and a part of that movement.

Wednesday, June 17, 2009

Not a Science Fiction Movie: History of Computers

During the year 1939, the introduction of the computer may have been met with contempt or with great anticipation? Perhaps then (1939) some people may have asked the question – "Why technology? "

Now in the year 2009, years after Charles Babbage introduced what was known as the “Babbage Engine", a first generation computer, the question is not why, but "why not technology?"

To find out about the history of the computer following its introduction and its metamorphosis from 1939 until 1994 visit the “Computer History Museum” website at http://www.computerhistory.org/ Make sure you visit the timeline link that provides chronological timelines of computer related topics. Also worth a visit are links to the various exhibits that showcase computer artifacts.

Where does the history of the computer belong in the classroom? In my opinion, the very existence of at least one computer in every classroom warrants a visit to the "Computer History Museum" website.

Pictures from: Microsoft Office Online Graphics

Friday, May 15, 2009

A computer in a keyboard?

Yes I said a computer in a keyboard.

How about just having a keyboard that does the same thing as a full desktop or laptop computer. Now I know what some of your are thinking. Hey we have cell phones that have all the functionality of a computer without the peripheral ports other than an SD card reader. Well this one seems to be something neat to me. A new cool tool that might be something fun to have.

The ASUS Eee Keyboard. It is a full qwerty keyboard minus the number pad. Now in the place of the number pad there is an 800x600 pixel resolution touchscreen display which also acts as a touch pad. What are some of the other features; a 1.6GHz processor, a possible 32GB SSD, 802.11n, bluetooth, HDMI, 2 USB 2.0, audio in/out and vga port. Not bad for a product who's projected price point comes in between $400-600 dollars.

So in the short I think it looks like a promising product that I would like to see in the retail market so that I can test it out. It may be something really good for use in the home. I would bet with some additional peripherals you can get this hooked up to your HD/LCD TV and use it sitting on the couch watching he ball game. Maybe there could be some sort of wireless monitor that could be out there you could use with this keyboard. Oh wait another on the horizon product from ASUS is the wireless monitor, but that is another post all together.

Check it out next month and make your own decision.

image provided by: ASUS

Friday, April 25, 2008

We Have to Convince Teachers of the Tremendous Importance of Technology Integration


We know that students are digital natives. Everyone agrees with this. If teachers want to truly reach their students, they must integrate technology into their curriculum. Teachers have a lot of competition when it comes to holding the students attention. They need to use the technology tools that the digital natives use on a daily basis. There are so many ways to accomplish this. Podcasting, Quest Atlantis, blogs, RSS feeds, wikis and google docs (to name a few) are tools that teachers can use to make learning fun for their students. We have to prepare our students for the world that they will be living in, not the world we knew when we were kids. Our students will have to compete, survive and thrive in a technological global economy. Are we doing our students justice by using the same teaching methods that were used when we were in school?